About the application
AXIS Loitering Guard monitors an area of interest and sends an alarm if people, vehicles, or other objects move around inside the area for too long. This behavior is considered loitering. The alarm can be used by Axis network video devices, and by third-party software, to, for example, alert security staff or record video.
To reduce false alarms, use filters to ignore objects such as swaying foliage and small animals.
Use profiles to create multiple configurations, for example for daytime and nighttime or for different parts of the scene. Each profile has its own settings and generates its own alarms.
Requirements
The application can be installed on Axis network video devices that support AXIS Camera Application Platform. A complete list of compatible devices and firmware versions is available at axis.com/applications
We recommend the following browsers:
ChromeTM
Firefox®
Camera mounting recommendations
Before you start to use the application, consider the following recommendations:
If the monitored area has significant differences in elevation, create multiple profiles and set up the perspective in each profile. See How to work with profiles.
Detection accuracy may be affected by weather conditions such as heavy rain or snow.
Make sure that the lighting conditions are within the product’s specification. Use additional lighting if needed.
Make sure that the camera is not subject to excessive vibrations. Vibrations might trigger false alarms.
Each time a PTZ preset position changes, the application needs to recalibrate. We do not recommend to run a guard tour together with loitering guard.
Each time the filters change, the application recalibrates. Objects detected before you change filters therefore need some time to be redetected by the application.
Small and distant objects might not be detected.
Objects approaching in a straight line towards the camera need to move a longer distance before they are detected compared to other objects.
Install the application
To install applications on the product you need administrator rights.
To download the application, go to axis.com/applications.
Log in to the camera’s webpage.
Go to Settings > Apps and click Add.
Upload the application file (.eap) to the camera.
Start the application
Log in to the product's webpage and go to Settings > Apps.
Select the application.
Turn on the app with the toggle button.
Stop the application
Log in to the product's webpage and go to Settings > Apps.
Select the application.
Turn off the application with the toggle button.
Set up the application
This is an overview of how to set up the application.
Log in to the device interface as an administrator and go to Settings > Apps > AXIS Loitering Guard.
Select the application and click Open.
Use profiles to create multiple configurations, for example for daytime and nighttime or for different parts of the scene. Each profile has its own settings and generates its own alarms.
To define the parts of the scene in which moving objects should be detected, use include and exclude areas.
Set up the loitering conditions.
Use visual confirmation to make sure that all objects that should be detected are detected.
Trigger an alarm with the test alarm function.
If the application triggers too many unwanted alarms, use one or more of the filters.
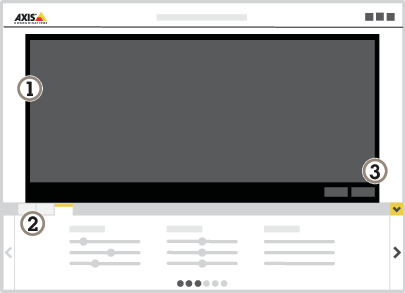
- Live view
- Profile settings
- Test alarm and visual confirmation
How to work with profiles
Each profile triggers its own alarms and has its own settings, making it possible to create events with different actions in the camera and third-party software. For example, to use one configuration during the day and one during the night, create two profiles with different settings. Then create one action rule for each profile and use daytime and nighttime schedules as additional conditions.
- When to use multiple profiles:
to set up different configurations for day and night
to use multiple include areas
to set up different configurations for different PTZ preset positions
when you want to use multiple include areas
to set up several action rules with different loitering conditions
if the camera monitors an area with differences in elevation, profiles with different perspective setups can be used to filter small object. Divide the area into regions without significant elevation differences and create one profile for each region. In each profile, modify the include area to cover the region and calibrate perspective in the region instead of in the whole image. See Filter small objects in a scene with depth.
How to create a profile
Go to the application’s webpage and click
To copy the settings from a previously created profile, select a profile from the list Import settings from.
To rename the profile, go to Profile properties and click
Type the name in the text field and click Done.
How to delete a profile
If you delete a profile that is used by an action rule or by a third-party software, remember to delete or edit the action rule or third-party software as well.
- Click the cross on the profile’s tab or do the following:
Select the profile’s tab.
Go to Profile properties and click
Click and confirm by clicking Done.
How to connect a profile to a PTZ preset position
Each time the preset position changes, the application needs to recalibrate.
To restrict detection to a specific preset position, you can connect the profile to a preset position.
Go to the application’s webpage and select an existing profile, or click to create a new profile.
Turn on Connected preset position with the toggle button.
From the drop-down-list, select a preset position.
To detect loitering in all preset positions, select All preset positions.
Add alarm overlays to video streams
To show what triggered an alarm in the live and recorded video stream, turn on alarm overlay. When alarm overlay is turned on, a rectangle is shown around objects that trigger alarms.
The alarm overlays are burnt in to the video stream. You can’t remove them from recorded video.
If you use view areas, the alarm overlays only appear in the first view area. The default name of the first view area is View area 1.
Go to the application’s webpage and select an existing profile, or click to create a new profile.
Turn on Alarm overlay.
Select in which resolution alarm overlays should appear. You can only select one resolution and it will be applied to all profiles with alarm overlay.
Click Next.
Open your video management software (VMS) and place the windows side-by-side.
To make sure that the alarm overlays show up in the video streams, go back to the application’s webpage and click Test alarm.
Click Finish.
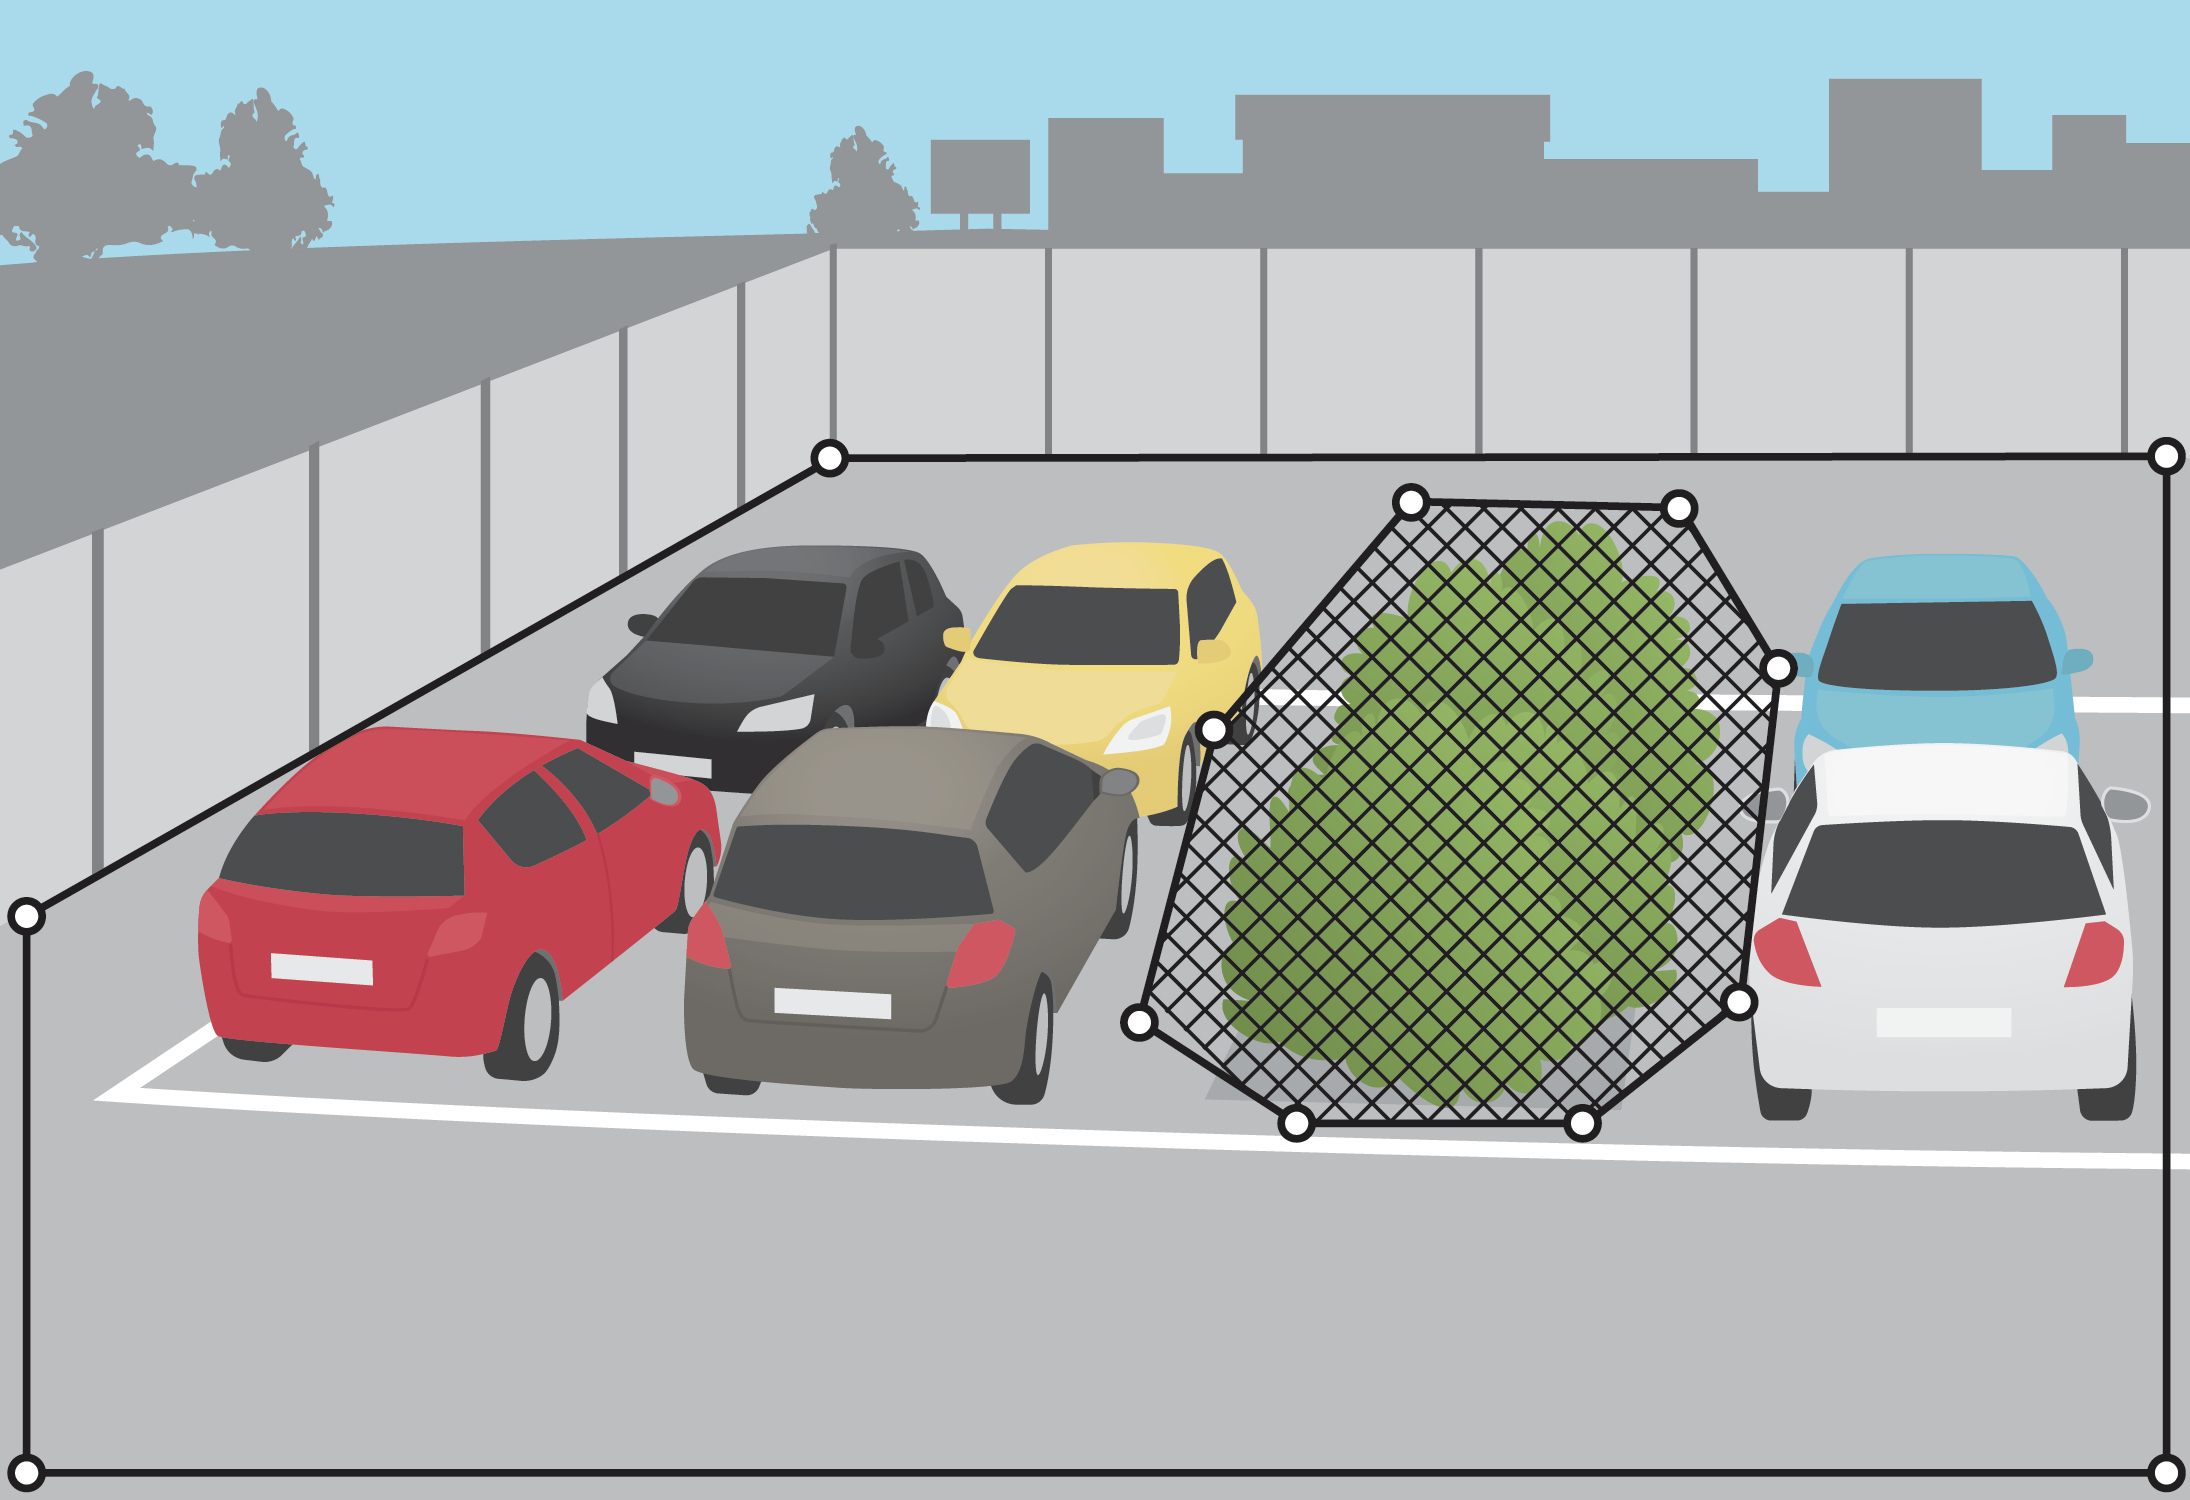
Include area
The include area is the area in which loitering objects trigger alarms. Objects can trigger alarms even if only a part of the object is inside the include area. The application ignores any loitering objects outside the include area.
The default include area is a rectangle that covers the whole image.
Use the mouse to reshape and resize the area so that it only covers the part of the image in which loitering objects should be detected. The default rectangle can be changed to a polygon with up to 10 corners.
To add a new corner, click the border of the include area. Drag the corner to the desired position.
To move a corner, click and drag the corner to the new position.
To remove a corner, right-click the corner.
To move the entire include area, place the mouse pointer inside the area. When the pointer changes shape, drag the area to the new position.
To select the include area, click inside the include area, or click .
To reset the include area to its default size, click .
Recommendation
If there’s a busy road or sidewalk close to the include area, draw the include area so that objects outside the include area don’t accidentally get detected. This means you should avoid drawing the include area too close to the busy road or sidewalk.

Exclude areas
An exclude area is an area inside an include area in which loitering objects do not trigger alarms. Use exclude areas if there are areas inside the include area that trigger a lot of unwanted alarms. As soon as the object enters an exclude area, the application pauses the loitering time for that object. When the object reenters the include area, the loitering time continues to increase.
You can create up to 3 exclude areas.
Use the mouse to move, reshape and resize the area so that it covers the desired part of the image. The default rectangle can be changed to a polygon with up to 10 corners.
To add a new corner, click the exclude area border. Drag the corner to the desired position.
To move a corner, click and drag the corner to the new position.
To remove a corner, right-click the corner.
To move the exclude area, place the pointer inside the area. Click and drag the area to the new position.
To add an exclude area, click
To select an exclude area, click in the exclude area, or click
To remove an exclude area, click
Recommendation
Place exclude areas inside the include area. Use exclude areas to cover, for example, moving trees or vegetation that trigger false alarms.
About loitering conditions
Loitering conditions define when there is loitering in the area. Set the maximum time an object is allowed to loiter before an alarm triggers and then choose between the following conditions:
Individual means the application tracks the time for individual objects. If the object is loitering inside the include area for a longer time than specified, an alarm triggers. The loitering time starts counting when the object enters an include area. If the object leaves the include area the application resets the individual loitering time.
If two or more objects move close together, they sometimes merge. The merged object is considered a new object and inherits the time from the object that has the longest loitering time.
Group means the application tracks the time for the entire include area. If there is loitering inside the include area for a longer time than specified, an alarm triggers. The application resets the group loitering time when there haven't been any objects in the area for a while.
You can combine the conditions by creating different profiles. Both conditions cannot be selected in the same profile. See How to set up both individual loitering and group loitering.
Filters
If the application triggers too many unwanted alarms, start by modifying the include and exclude areas. If too many alarms are still triggered, use one or more of the filters:
- Small objects
- Use this to ignore small objects.
- Swaying objects
- Use this to ignore objects that only move a short distance.
Filter recommendations
Filters are applied to all moving objects found by the application and should be set up with care to make sure that no important objects are ignored.
Use as few filters as possible.
Set up one filter at a time and use visual confirmation to check the settings before you turn on another filter.
Change the filter settings carefully until you’ve reached the desired result.
The small objects filter
The small objects filter reduces false alarms by ignoring objects that are small, for example small animals.
- Available small objects filters:
No depth is suitable if there is no or only a small depth in the image, and in situations where perspective cannot be used. It could, for example, be situations when the camera has a bird's-eye view or monitors an area with significant differences in elevation. See How to filter small objects in a scene with no depth.
Depth provides the best false alarm reduction and is recommended for most installations. Select this option when the image has a significant depth, that is, when objects far from the camera appear smaller than objects close to the camera. See Filter small objects in a scene with depth.
When the image has a significant depth, the perspective needs to be calibrated. During calibration, the application compares the height of the objects as they appear in the image with the actual heights of the corresponding physical objects. The application uses the calibrated perspective to calculate the object size before applying the small objects filter.
- The filter applies to all objects in the image, not just objects in the same position as the setup rectangle.
- The application ignores objects that are smaller than both the entered height and the entered width.
Filter small objects in a scene with depth
Go to the application’s webpage and select an existing profile, or click to create a new profile.
Go to Filters > Small objects and click
Turn on the filter with the toggle button.
Select depth.
Calibrate the perspective. See Calibrate perspective.
Set the size of objects to exclude.
If you select An adult, objects smaller than 75 x 75 cm are excluded.
If you select A custom size, you set the size of objects to exclude. To not trigger alarms, objects must be smaller than both the entered height and the entered width.
To check the filter settings, move the rectangle in the live view and make sure objects that should not trigger alarms fit inside the rectangle.
When you drag the rectangle in the live view, it adapts to show how large an object of the entered height and width is at that position in the image.
Click Finish.
Calibrate perspective
Place vertical bars in the image to calibrate perspective. The bars represent physical objects at different distances from the camera.
In the live view, choose two or more objects of known height, for example humans or fence poles, that are located on the ground and at different distances from the camera.
Click and place one bar at each object in the live view.
To adjust the length of the bars to match the height of the object as it appears in the image, click and drag at the end points.
For each bar, enter the corresponding object’s height.
To improve the calibration, add additional bars.
Example
If there is a fence with 2 meter high poles extending from the camera towards the horizon, position the bars at the fence poles, adjust their lengths and enter 200 cm (6 ft 7 in) in the fields.
How to filter small objects in a scene with no depth
Go to the application’s webpage and select an existing profile, or click to create a new profile.
Go to Filters > Small objects and click
Turn on the filter with the toggle button.
Select no depth.
Change the object size by doing one of the following:
To resize the rectangle in the live view, use the mouse. The application ignores all objects that fit inside the rectangle. To compare the filter size with the size of real objects in the image, place the rectangle in different places in the live view.
Enter the width and height in the fields.
Click Finish.
The swaying object filter
The swaying objects filter ignores objects that only move a short distance, for example swaying foliage, flags, and their shadows. If the swaying objects are large, for example large ponds or large trees, use exclude areas instead of the filter. The filter is applied to all detected swaying objects and, if the value is too large, important objects might not trigger actions.
When the swaying object filter is turned on and the application detects an object, the object does not trigger an action until it has moved a distance larger than the filter size.
Set up the swaying objects filter
The filter ignores any object moving a shorter distance than that from the center to the edge of the ellipse.
- The filter applies to all objects in the image, not just objects in the same position as the setup ellipse.
- We recommend that you begin with a small filter size.
- If the swaying object filter is too large, objects might not fulfill the loitering criteria and, in turn, not trigger alarms.
Go to the application’s webpage and select an existing profile, or click to create a new profile.
Go to Filters > Swaying objects and click
Turn on the filter with the toggle button.
To resize the filter in the live view, use the mouse or change the value in the Distance field.
To compare the filter size with the size of real objects in the image, place the ellipse in different places in the live view.
Click Done.
Visual confirmation
Use visual confirmation to make sure that all objects that should be detected are detected.
There are two types of visual confirmation in the live view:
Outlines on all moving objects. A green outline indicates that the application has detected the object. If an individual object reaches the maximum time limit, the outline turns red and the application sends an alarm. If group loitering reaches the maximum time limit, the whole include area turns red and the application sends an alarm.
A progress bar that shows up under the object. When the loitering object, or objects, reaches the maximum time limit, the progress bar turns completely red and the application sends an alarm.
- Visual confirmation can cause video latency and affect performance during configuration.
- If you change PTZ preset position, the application needs a few seconds to recalibrate. This causes a delay before visual confirmation shows up again.
- To improve performance, visual confirmation automatically turns off after 15 minutes.
To turn on visual confirmation, click Visual confirmation.
How to use the application in multichannel products
In multichannel products, the application can be used on several channels simultaneously. Each video channel has its own profiles with an include area, exclude areas, and filters.
For a complete list of supported multichannel products, see www.axis.com
- Running the application on several channels simultaneously may affect the product’s performance.
- To use the application on multiple channels, the application must be turned on and configured for each channel.
- To switch between channels, select from the list of channels in the live view.
- To disable a channel remove all its profiles.
Record video when there is an alarm
The following example explains how to set up the Axis device to record video to an SD card when the application triggers an alarm.
In the product’s webpage, go to Settings > Apps and make sure the application is running.
To check that the SD card is mounted, go to Settings > System > Storage.
Go to Settings > System > Events and add a rule.
Type a name for the rule.
In the list of conditions, under Applications, select the application profile. To trigger the same action for all profiles, select Any Profile.
In the list of actions, under Recordings, select Record video.
Select an existing stream profile or create a new one.
In the list of storage options, select SD card.
Make sure the SD card is mounted.
Go back to the application’s webpage. To test the rule, click Test alarm in the live view.
How to set up both individual loitering and group loitering
This example explains how to set up two profiles with different loitering conditions.
Log in to the application’s webpage, go to Profile properties and click
Change the profile name to “Individual loitering”.
Go to Loitering conditions and click
Select the option Individual.
Enter how long an individual object is allowed in the include area before an alarm triggers.
Click Done.
Click the tab.
Go to Profile properties and click .
Change the profile name to “Group loitering”.
Go to Loitering conditions and click
Select the option Group.
Enter the maximum accumulated time for several loitering objects in an include area before an alarm triggers.
Click Done.
Set up two different action rules, one with profile “Individual loitering” as a trigger and one with profile “Group loitering” as a trigger. See Record video when there is an alarm.
Troubleshooting
| Too many false alarms |
If the application triggers unwanted alarms for objects outside the include area, point the camera so that the live view only covers the area of interest. 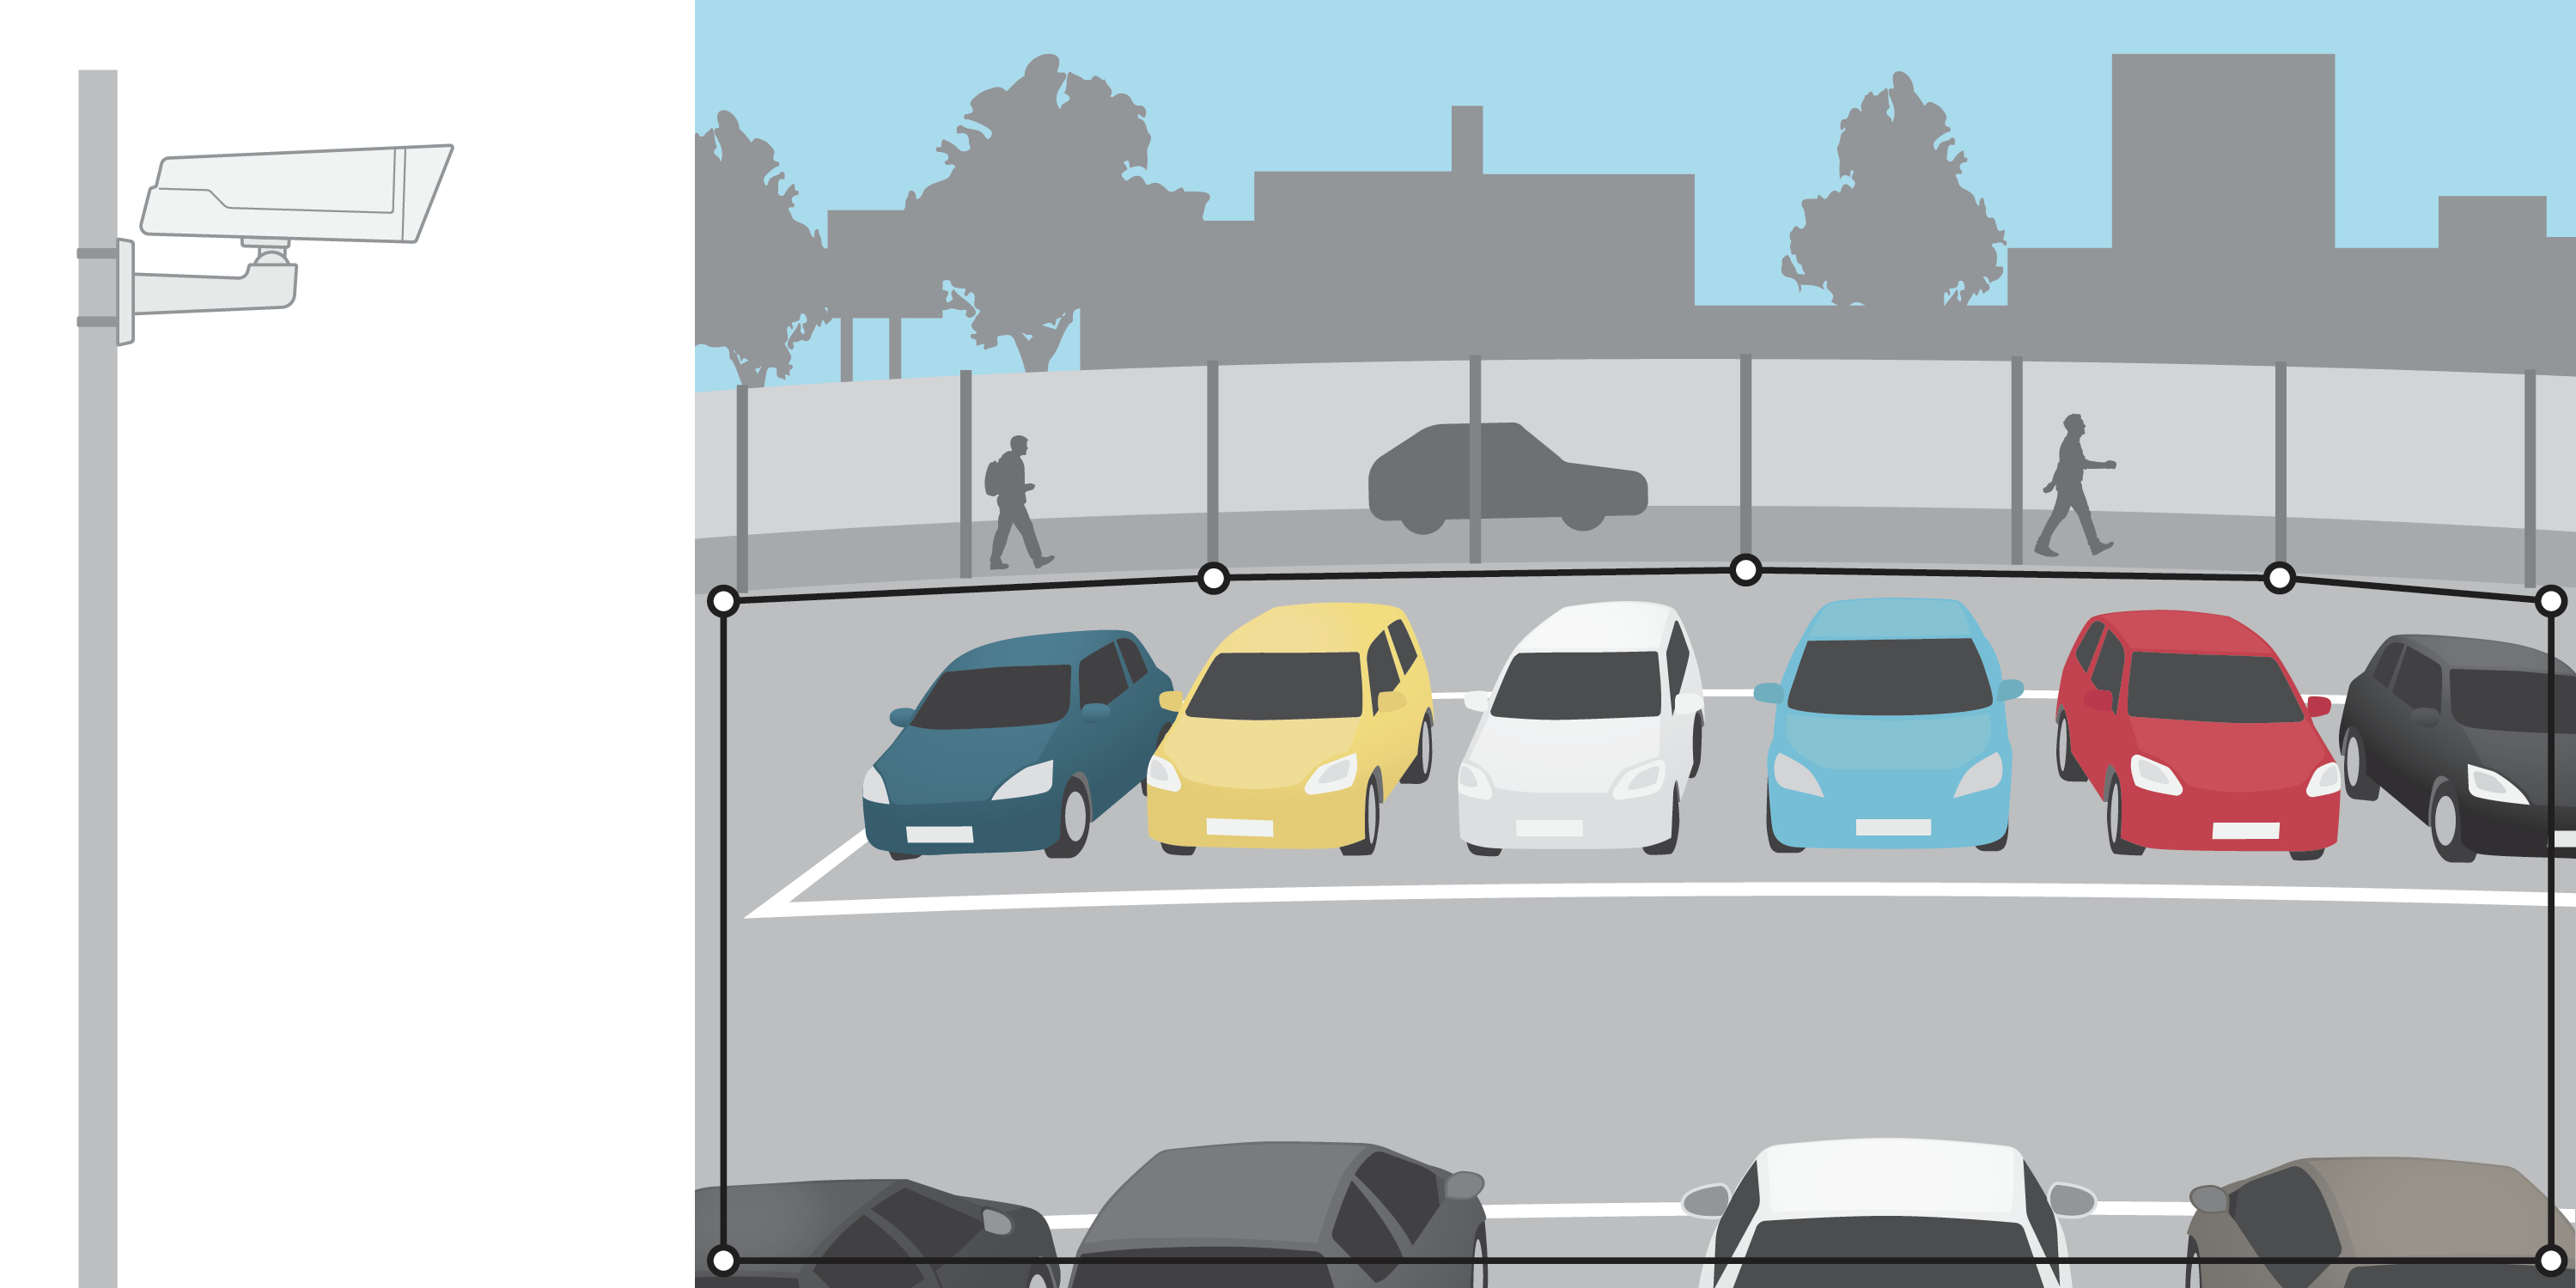 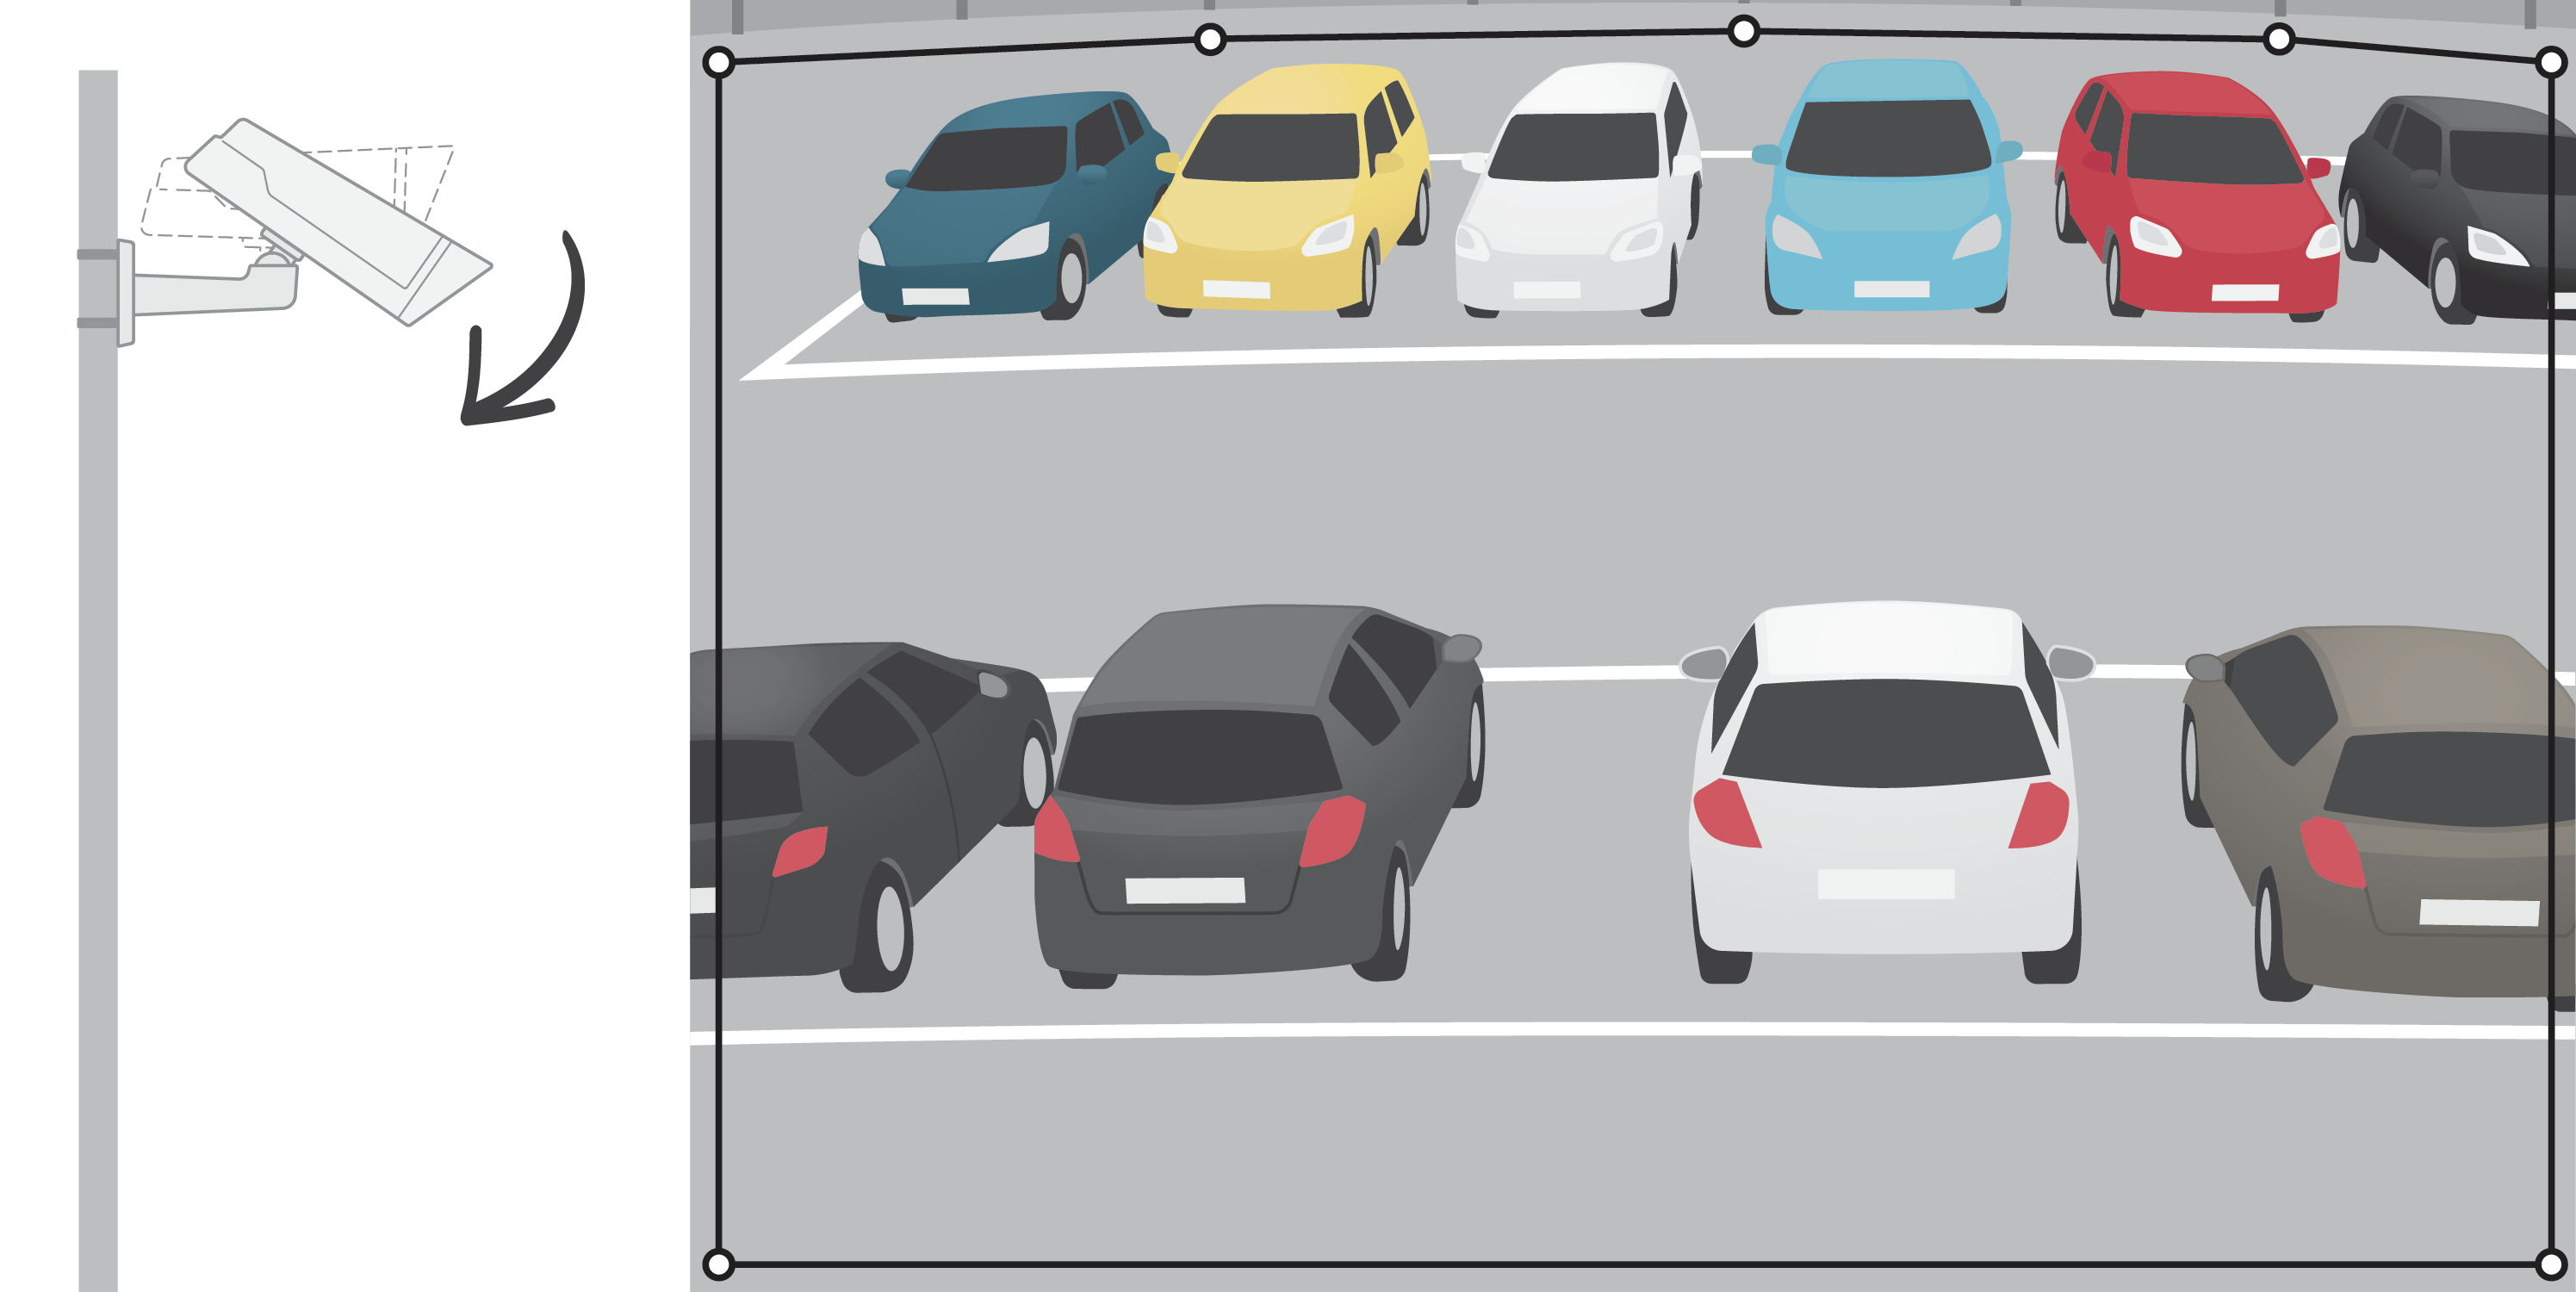 |