About
AXIS Radar Data Visualizer is an application that combines 180° radar detection and 180° panoramic images for monitoring large open areas. Connecting a radar and a panoramic camera extends the detection distances:
AXIS D2110-VE Security Radar:
People: up to 60 meters (200 feet)
Vehicles: up to 85 meters (280 feet)
AXIS D2122-VE Radar:
People: up to 100 meters (330 feet)
Vehicles: up to 140 meters (460 feet)
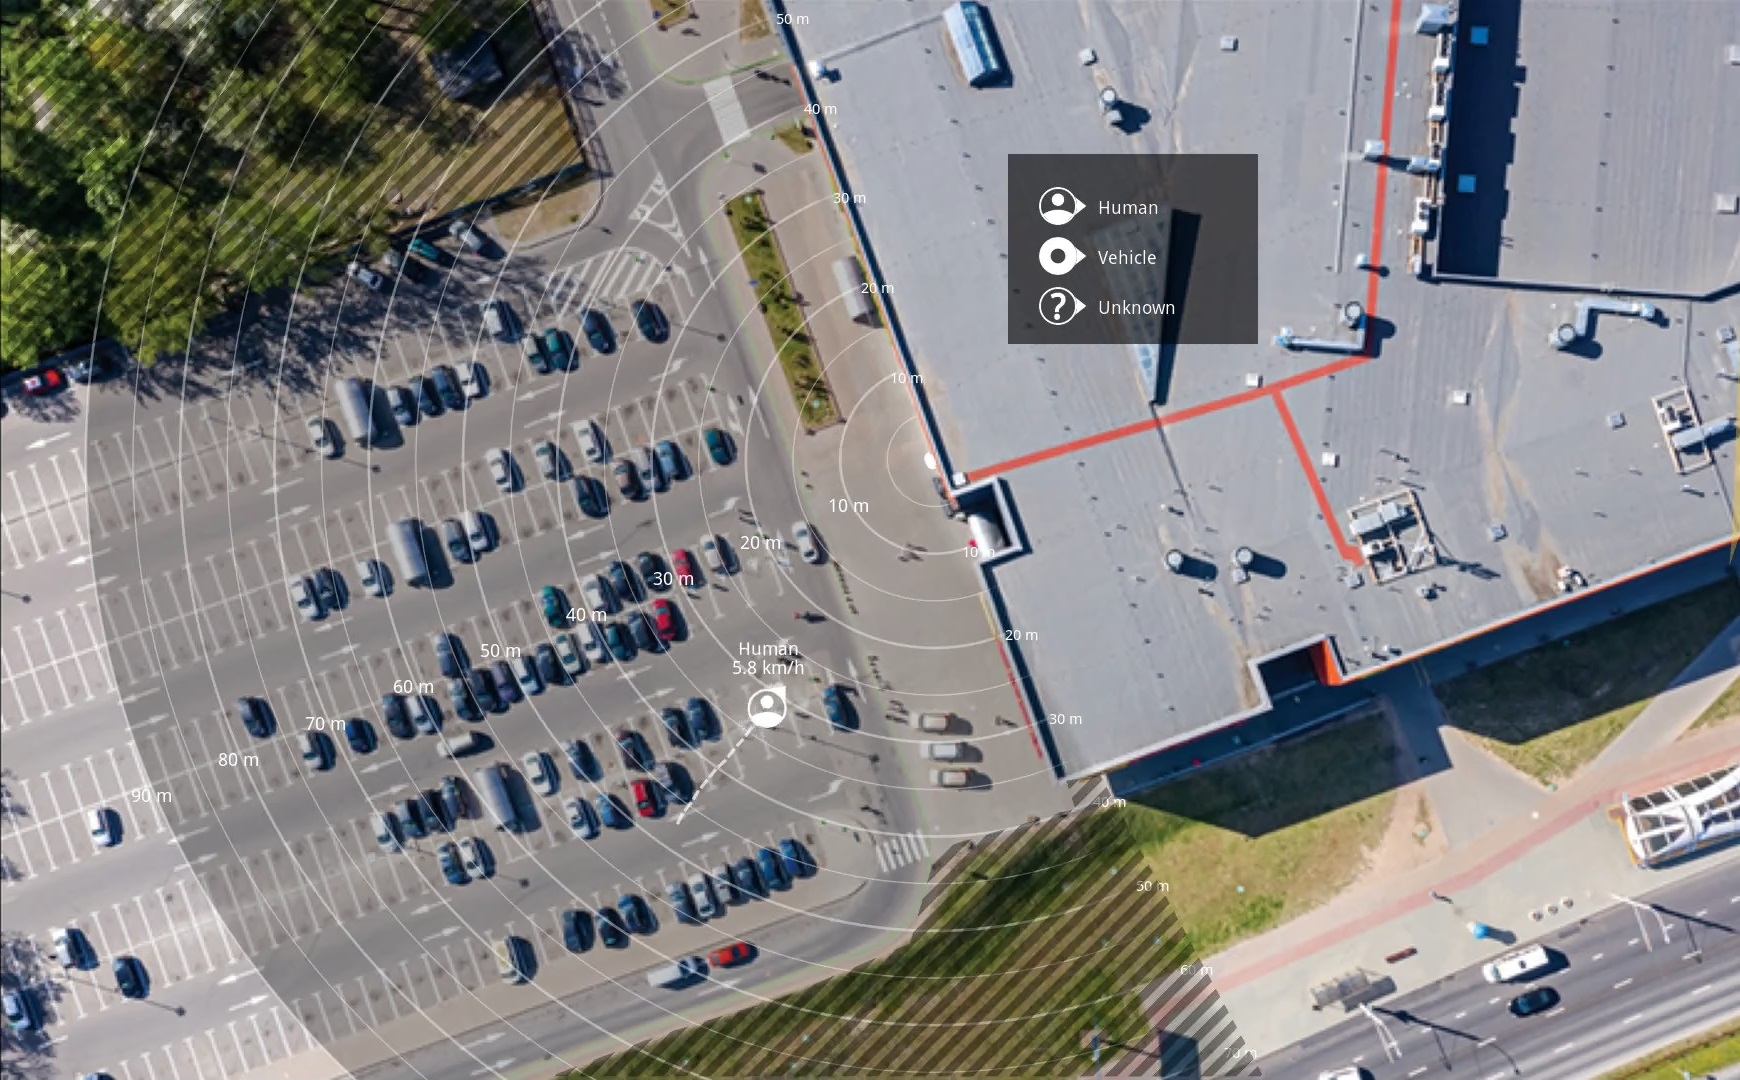
The application can then present the object class, distance and speed as visual, customizable overlays in the camera view. You can also use the data to trigger events.
Requirements
The radar and the panoramic camera need to be mounted and configured according to their respective installation guide.
The panoramic camera needs to be mounted over or under the radar at a maximum distance of 50 cm (1.6 feet) .
The radar and the panoramic camera must be vertically aligned.
The radar and the panoramic camera must be level with the horizon. For AXIS Q3839 and AXIS Q4809 you can use roll to level the camera.
For a list of compatible cameras see AXIS Radar Data Visualizer | Axis Communications.
For a list of radars, go to axis.com/products/radars.
Get started
Calibrate the radar
When the radar is installed, the default live view of the radar will show the radar coverage and any detected movement, and you can add scenarios and rules right away. Before you set up the connection with the radar and configure the application overlays, calibrate the radar for the scene.
Check that the mounting height of the radar corresponds with the radar’s set height in the camera’s web interface. If the radar is mounted on a different height, you need to calibrate the radar to compensate for the mounting height.
To calibrate the radar:
Log in to the camera’s web interface.
Go to Radar > Settings > General and enter the mounting height.
In Radar > Settings > Detection, turn on Ignore swaying objects to exclude bushes, trees and signs from your scenarios. Make sure there is no road sign just in front of the radar.
Map calibration
To make it easier to see where objects are moving, upload a reference map, for example a ground plan or an aerial photo, that shows the area covered by the radar.
- Image requirements:
Supported file formats are jpeg and png.
The image can be cropped in the radar.
The orientation is not important, since the radar coverage shape will move to adapt to the image during calibration.
Go to Radar > Map calibration and follow the setup assistant to upload and calibrate your map.
For more information about the radar settings, see the user documentation for your radar on axis.com.
Select a radar profile
AXIS D2122-VE has only the area monitoring profile.
Axis radars have support for two different monitoring profiles: area monitoring and road monitoring. To use AXIS Radar Data Visualizer, select the area monitoring profile.
Log in to the radar’s web interface.
Go to Radar > Settings > Detection > Radar profile
Select Area monitoring .
The profile is optimized for tracking humans, vehicles, and unknown objects moving at speeds up to 55 km/h (34 mph).
- For information about detection ranges, installation examples and use cases, see the radar’s user manual at help.axis.com.
Download and install the application
To install the application, go to axis.com/products/axis-radar-data-visualizer and download the latest version. Log in to the panoramic camera you want to connect to the radar, and follow these steps:
Log in to the panoramic camera’s web interface.
Go to Apps.
Click Add app.
Select the file in your downloads folder.
Click Install.
Turn on the app to activate the application.
To upgrade the application, just install the new version. There is no need to uninstall the previous version.
Configuration
Pair the camera with a radar
For Radar Data Visualizer to work, you need to pair the panoramic camera to a radar. In the panoramic camera’s web interface:
Open AXIS Radar Data Visualizer in Apps.
Click Open edge-to-edge.
Click Add.
Select pairing type.
Enter the radar’s IP address, username and password.
Click Connect.
Configure bounding boxes and metadata
You can choose if you want to show or hide bounding boxes and metadata.
- In AXIS Radar Data Visualizer:
Go to Video stream settings.
To show or hide the bounding boxes, turn on or off Show bounding boxes.
To include metadata, select Show distance and vehicle speed.
You can calibrate the bounding boxes to adjust an incorrect alignment in the vertical positioning of the boxes:
- In AXIS Radar Data Visualizer:
Go to Calibrate bounding boxes.
Click the arrows to adjust the vertical position of the bounding box.
To calibrate the bounding boxes, a person or a vehicle needs to be present in the scene.
Select regional settings
Select the units for speed and distance in the application.
- In AXIS Radar Data Visualizer:
Go to Regional settings.
Select if you want to show the speed in kilometers per hour (km/h) or miles per hour (mph).
Select if you want to show the distance in meters or feet.
Create detection zones
Create detection zones and set up the application to detect moving objects or speeding vehicles. With the event management system in Axis devices, or with third-party software, you can trigger actions based on the detections in the zones.
- In AXIS Radar Data Visualizer:
Click + Detection zone. A yellow box will appear on the live view.
To change the shape of the zone, click and drag the anchor points in the corners of the yellow box.
Type a name for zone.
Select what you want the zone to detect and trigger on:
Trigger on moving objects sends an event when a moving object is detected within the detection zone.
Trigger on vehicle speed sends an event when detected vehicles in the detection zone drive within or outside of a set speed range.
- Note
You can select one trigger only, or use both triggers simultaneously. They work independently from each other. For example, the object types you select in Trigger on moving objects will not affect the settings in Trigger on vehicle speed.
- To trigger on moving objects in the zone:
Turn on Trigger on moving objects.
Select the object type, or types, to trigger on. The following types are available:
Human
Vehicle
Unknown
- To trigger on vehicle speed:
Turn on Trigger on vehicle speed.
Define the speed at which you want to detect vehicles.
Use the slider to set a speed range, or type the minimum and maximum values for the range in the From and To fields.
To trigger on speeds outside the set range, click Invert slider. The From and To fields will automatically change to Below and Above.
- To delete a zone, select the zone in the list and click Remove detection zone.
- Note
To show the video stream without your added detection zones, go to Video stream settings and turn off Show detection zones.
Set up rules for events
You can create rules to make your device perform an action when certain events occur. A rule consists of conditions and actions. The conditions can be used to trigger the actions. For example, the device can start a recording or send an email when it detects motion, or show an overlay text while the device is recording.
To learn more, see Get started with rules for events.
Trigger an action
Go to System > Events and add a rule. The rule defines when the device will perform certain actions. You can set up rules as scheduled, recurring, or manually triggered.
Enter a Name.
Select the Condition that must be met to trigger the action. If you specify more than one condition for the rule, all of the conditions must be met to trigger the action.
Select which Action to perform when the conditions are met.
- If you change the definition of a stream profile that is used in a rule, you need to restart all the rules that use that stream profile.
Record a zoomed-in view of moving objects in the scene
This example explains how to set up the device to start recording a dynamic view area whenever the view area is activated by a moving object in the scene. If you have several dynamic view areas, create one rule for each of them. For more information, see Dynamic view areas.
In AXIS Radar Data Visualizer, turn on Dynamic view areas.
In the device’s web interface, go to System > Events and add a rule.
Give the rule a name, for example
Record dynamic view area 1.In the list of conditions, under Applications, select ARDV –Dynamic View Area [number].
In the list of actions, select Record video while the rule is active.
In the list of cameras, select the same dynamic view area as you selected in the condition.
Select where to store the recordings.
Click Save.
Learn more
Dynamic view areas
A dynamic view area is a cropped part of the full view, which is activated and placed automatically around a moving object in the scene. You can stream and record dynamic view areas that focus on objects.
Use dynamic view areas for low-activity scenes, such as a parking lot that is closed for the night.
When you turn on dynamic view areas, one area is automatically added. You can add three more for a total of four.
When a moving object enters a detection zone, a dynamic view area centers around that object and tracks it until it disappears from the scene. If you add four dynamic view areas, you can track four different moving objects continuously. If there are more moving objects than dynamic view areas, the new object will be tracked once an already tracked object disappears from the scene.
You can create up to eight view areas in total in the camera. One of them is reserved for radar connection, and four of them can be dynamic view areas. You must create dynamic view areas in AXIS Radar Data Visualizer.
We recommend that you delete dynamic view areas in AXIS Radar Data Visualizer. If you delete dynamic view areas from Video > View areas in the camera’s web interface, you could interfere with the dynamic view area configuration.
Example
There are seven regular view areas in the camera’s web interface. When you go to AXIS Radar Data Visualizer and turn on Dynamic view areas, one dynamic view area is added. When you try to add another one, you get an error message. To add more dynamic view areas, you must first remove regular view areas from Video > View areas in the camera’s web interface.